So you’ve found the almost perfect image to use for your marketing collateral. If only it was a little bigger and didn’t have that ugly background!
In the past, you might be forced to scrap the photo and find something else instead. But with the help of Photoshop Beta’s generative fill tool, you can easily resize images with legitimate-looking backgrounds — all without needing a graphic design degree.
Here’s the five-step method you need to follow to use generative fill with Photoshop Beta.
But before we get too far ahead, let’s back up and define our terms.
What Is Generative Fill With Photoshop Beta?
Photoshop Beta uses AI to extend the background of any photo. Using context clues and a depth of training data, Photoshop’s program can take any photo and make it larger by adding more content — not by stretching out its dimensions.
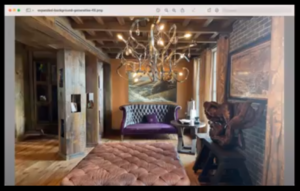
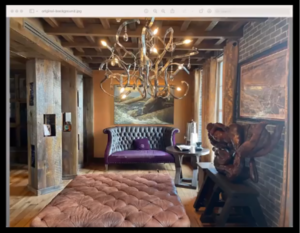
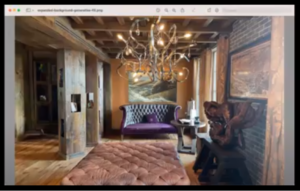
For example, here’s an image of a hotel lobby that’s too small to be used as a virtual background on Zoom.

Once you upload the picture to PhotoShop Beta, you can extend the background and widen the photo by filling in the background with contextual elements. This avoids stretching or distorting your image while resizing the picture to your specified dimensions.
Now it’s ready to use for your upcoming Zoom meeting!
You can use Photoshop Beta’s generative fill function to accomplish all sorts of tasks for your business. For example:
- You can turn smaller images into custom-sized pictures for Facebook posts, GMB updates, and more.
- You can remove unwanted distractions by narrowing and regenerating backgrounds.
- You can turn portrait-style photos into landscape images.
- You can recycle images on your phone to make quality marketing collateral.
Now, let’s dive into the steps you need to try generative fill for yourself.
How To Use Generative Fill With Photoshop Beta: 5 Easy Steps
To use Photoshop Beta’s generative fill, you need to:
- Purchase a Creative Cloud subscription.
- Use the crop tool.
- Extend your image.
- Select the extension.
- Click ‘Generative Fill.’
Let’s break it down a little further.
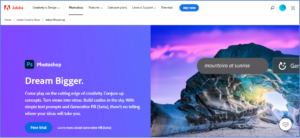
1. Generative fill is only available on Photoshop Beta, which requires a creative cloud subscription. You can check out the prices and customize your bundle at any time on the Adobe website.
2. Once you’ve launched Photoshop on your device, import your photo as a new project. Let’s use the same image as before.
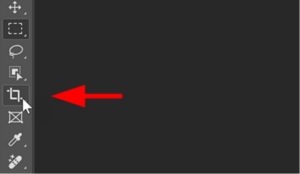
3. This step requires three stages. First, select the crop tool.
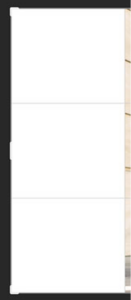
Second, drag the image out to its desired length.

Finally, press the ‘Enter’ key (or Return on Mac) to temporarily fill this space with white.
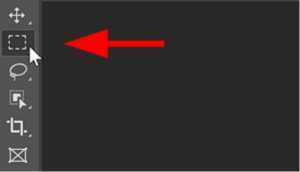
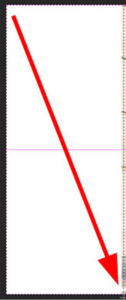
4. Select the extended canvas using the marquee tool.
Your final result should look something like this:
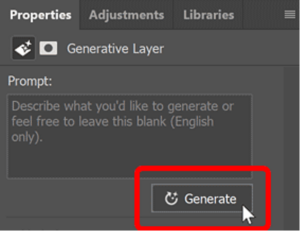
5. Now for the fun part: generating the image!
Just click the ‘Generative Fill’ button below your selection to fill the white space with content.
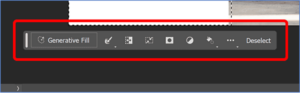
You can describe what you want to see in your image, but leaving the text box blank isn’t a problem for contextual extensions like this one.
And voilà! Your new image is now ready for the world.
Don’t like what Photoshop created? You can iterate as much as you’d like! You’re welcome to click ‘Generate’ again to come up with a new background idea.
Learn More About Photoshop With Autumn Consulting
Generative fill is an exciting new way to extend your marketing repertoire.
That said, it’s just one piece of the puzzle — and staying up-to-date with changes in the marketing world can make all the difference while
If you enjoyed this article from Autumn Consulting, an award-winning Google search marketing firm, we invite you to explore similar articles in our knowledge hub:
- Visual Marketing – Make Your Point in Pictures and Videos
- Google Bard: What Is It And How It Works
- What Is ChatGPT4: What Small Business Owners Should Know
Want to learn more about how Autumn Consulting acts as a force multiplier for digital marketing campaigns? Give us a call at (813) 618-7554 to chat more about our services.


